

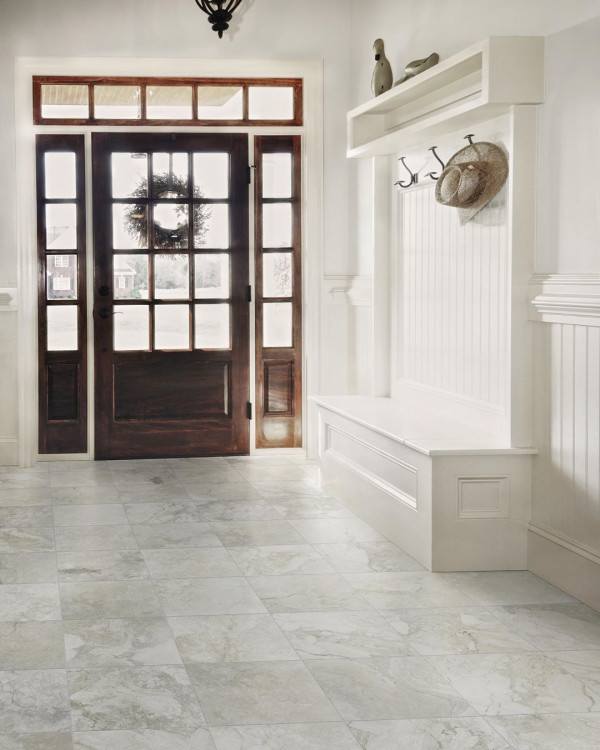
A cohesive tile-and-wood floor plan in a Mount Kisco home comes from two decisions: matching the undertones so the two surfaces read as one, and building the transition between them for how the materials actually move. Get the tones right and the floor looks intentional instead of patched together. Get the transition right and it stays that way, because wood swells and shrinks with the seasons while tile holds still. It's a design job and a build job at once. Here's how our design center and installers handle both, from picking tones to setting the threshold in the doorway.
Matching Undertones Is What Makes Tile and Wood Agree
Matching undertones is the single move that keeps tile and wood reading as one floor. Wood-look porcelain and real wood each carry a temperature (warm and golden, cool and gray, or a neutral greige in between), and the eye forgives almost any pairing as long as those temperatures match. A honey oak floor beside a cool gray-brown tile fights itself. The same oak beside a warm walnut-brown tile settles down. Pull your candidates from the same family and look at them together, on the floor, in the room's own daylight, because showroom light hides the exact undertone that turns up wrong at home. Start from the wood-look and stone-look planks in our tile selection and hold them against the real wood you are considering. The material changes. The tone shouldn't.
Let Function Decide Where Tile Stops and Wood Begins
Function should decide where tile stops and wood begins, because a material change reads as intentional when it lines up with how a room gets used. Tile belongs where water and grit live: the entry, the mudroom, the kitchen, a bathroom. Wood belongs where you want warmth and quiet underfoot, in the living room, dining room, and bedrooms, which is where the hardwood we carry pays off. When the switch falls on that line, nobody reads it as a seam. They read the kitchen as the kitchen. Force the change into the middle of an open sightline for looks alone and it looks arbitrary instead. Let the floor plan tell you where the junction goes, then design the transition to sit there cleanly. That single decision does most of the work of avoiding the patchwork feel.
Why the Transition Has to Account for How the Two Materials Move
The transition between tile and wood has to account for movement, because the two materials behave in opposite ways. Wood is hygroscopic: it takes on and gives off moisture with the air, swelling in a humid summer and shrinking in a dry, furnace-run Mount Kisco winter. The National Wood Flooring Association (NWFA), the trade group that writes the U.S. standards for wood floors, says a wood floor performs best when indoor air is held between 30% and 50% relative humidity at 60 to 80 degrees Fahrenheit. Let it swing and the boards move. A jump from 30% to 60% humidity adds up to more than 2 inches of width across a 10-foot-wide room. That's why solid wood is laid with a 3/4-inch expansion gap around every wall and obstruction, a space the NWFA sets equal to the thickness of the floor itself, so the boards can grow without buckling.
Tile does the opposite. It barely moves, taking on 0.5% or less of its weight in water and staying dimensionally stable, but a rigid tile field has its own rule. The Tile Council of North America (TCNA), whose EJ171 detail is the industry standard for tile movement, calls for soft movement joints at least 1/4 inch wide around the perimeter and anywhere tile meets a restraining surface or changes plane, plus interior joints every 20 to 25 feet (every 8 to 12 feet in direct sun or wet areas). Where a tile floor runs into a wood floor, that junction is both things at once: the restraining edge the tile needs a soft joint against, and the expansion edge the wood needs to grow into. Grout it solid and something has to give. The grout cracks, the tile tents, or the wood crushes its own edge. The fix is a real transition at the material change, built to move.
Handling the Height Difference With Reducers, T-Molding, or a Flush Transition
The height difference between tile and wood is the other problem the transition solves, and our flooring installation crews handle it three ways. A solid wood floor is about 3/4 inch thick. A tile floor is a stack: the tile sits on thinset mortar over a cement backer board that runs 1/4 inch or 1/2 inch on its own, so the finished tile surface rarely lands exactly level with the wood beside it. How big that step is decides the hardware.
Federal accessibility rules give a handy yardstick for the step. Under the ADA standard, a change in level up to 1/4 inch can be a straight vertical lip; between 1/4 and 1/2 inch it has to be beveled at a slope no steeper than 1:2; over 1/2 inch it needs a ramped transition. The three tools follow that height. A reducer ramps the higher floor down to the lower one and suits a big step. A T-molding bridges two floors sitting near the same height and drops into a gap that doubles as the wood's expansion space. A flush transition, where the surfaces meet dead level, looks best and takes the most work, since the subfloor under each material has to be built up so the finished heights match. That's routine on the uneven floors in older Mount Kisco homes, and getting the subfloor flat first is the step that makes a flush seam possible.
Where to Put the Transition and the Threshold at the Doorway
The transition belongs at a doorway or another natural break, centered under the door where it closes. Set the material change there and each room reads as its own surface, with the line tucked out of sight when the door is shut. A doorway is the right spot structurally, too, because it's a narrow pinch point where the tile field can take its soft joint and the wood can take its expansion gap without a seam running across an open room. Line the change up with a change of plane or the end of a cabinet run wherever the layout allows. Then carry the plank direction and the grout lines through the opening, so the two floors feel related across the threshold rather than stopped and restarted. A break the eye expects never reads as a patch.
Scale, Grout, and Plank Character That Tie the Rooms Together
Scale, grout color, and plank character are the design details that tie tile and wood into one floor once the transition is sound. Keep the plank widths close: a 5-inch wood-look tile next to a 5-inch wood board carries the eye across the change, while a wide tile beside a narrow strip breaks it. Choose a grout within a shade or two of the tile so the joints recede and the tile reads as planks rather than a grid. Match the character, too — a hand-scraped wood look wants a textured tile, a clean modern board wants a crisp one. Then repeat one supporting material in both rooms: the same baseboard profile, a shared cabinet tone, or a runner that borrows a color from each floor. Those small echoes are what make a mixed floor feel planned instead of assembled.
How Tile and Wood Move: What the Transition Absorbs
Tile and wood move so differently that the transition has to absorb the gap between them. The table sets the two behaviors side by side.
Behavior | Wood (and floating laminate) | Tile |
|---|---|---|
Response to humidity | Swells and shrinks; wants 30-50% indoor RH | Stable; 0.5% or less water absorption |
Expansion gap | 3/4 inch at walls, equal to floor thickness | None; relies on soft movement joints |
Movement joints | Perimeter gap hidden under trim | 1/4 inch at edges; every 20-25 ft (TCNA EJ171) |
Typical thickness | 3/4 inch solid | Tile on thinset over 1/4 to 1/2 inch backer |
At the junction | Needs room to expand | Soft flexible joint, never solid grout |
Questions We Get About Tile-to-Wood Transitions in Mount Kisco
Can tile and wood floors meet without a transition strip?
Tile and wood floors can meet with no visible strip, as long as a real transition still sits underneath. A flush, stripless seam works when the subfloor heights are built up so the two surfaces land level, with a flexible joint (a color-matched caulk in place of hard grout) left at the junction so the wood can keep moving. Butt the tile hard against the wood with solid grout and the seasonal movement cracks it within a year or two.
What transition goes between tile and hardwood?
The transition between tile and hardwood depends on the height difference. Floors near the same height take a T-molding that hides in the expansion gap; a taller tile floor takes a reducer that ramps down to the wood; matched subfloor heights allow a flush, caulked seam. In every case the wood side keeps its room to expand, which is the part a plain metal strip screwed down tight gets wrong.
Do older Mount Kisco homes need extra prep for a flush transition?
Older Mount Kisco homes usually do need extra prep for a flush transition, because their subfloors are rarely flat or level. A century-old floor can slope, dip, or bounce, and a flush tile-to-wood seam only holds when the substrate under both materials is leveled and solid first. Our crews check the subfloor with a straightedge and build it up where it needs it before either floor goes down.
Planning a Tile-and-Wood Floor That Lasts in Mount Kisco
Planning a tile-and-wood floor that lasts in Mount Kisco means treating the tones and the transition as one project. Match the undertones and the scale so the two floors read as one, put the material change where the room's function already asks for it, and build the junction to let the wood move while the tile stays put. Do all three and the patchwork feel disappears for good. When you're ready to lay it out, request a free in-home estimate and our design center and installers will walk your rooms, match the samples in your own light, and set the transitions where they belong.

